Hiding/Showing fingerings in chord diagrams
You can hide/show fingerings in chord diagrams shown alongside chord symbols and in used chord diagrams grids independently of each other and in each layout independently. You can choose whether fingerings appear inside dots or at the ends of strings.
Procedure
- Press Ctrl/Cmd-Shift-L to open Layout Options.
-
In the Layouts list, select the layouts in which you want to hide/show fingerings in chord diagrams.
By default, the layout currently open in the music area is selected when you open the dialog. You can select other layouts by using the selection options in the action bar, clicking and dragging across multiple layouts, Shift-clicking adjacent layouts, and Ctrl/Cmd-clicking individual layouts.
- In the category list, click Chord Symbols and Diagrams.
-
In the Chord Diagrams section, activate/deactivate the following options, individually or together:
-
To hide/show fingerings in chord diagrams shown alongside chord symbols, activate/deactivate Show fingerings in chord diagrams.
-
To hide/show fingerings in used chord diagrams grids, activate/deactivate Show fingerings in chord diagrams at start of flow.
-
-
Choose one of the following options for Fingerings position:
-
Inside dot
-
At end of string
-
- Click Apply, then Close.
Result
Fingerings are shown in the corresponding position in chord diagrams in the selected layouts when the options are activated, and hidden when they are deactivated. This also affects whether fingerings appear in the Edit Chord Diagram and Edit Chord Diagrams dialogs.
Example
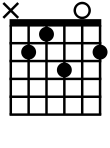
|
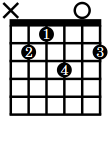
|
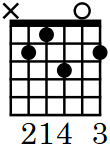
|
After Completing This Task
You can change the fingerings shown in chord diagrams when editing their shape.