Modulation Rows in the Zone Editor
For each source and each destination, modulation rows are available below the corresponding sections in the Zone Editor. These rows show the current modulation assignments.
If a source or destination section contains different tabs, the modulation section shows the assignments for the selected tab.
Sources
Envelope, LFO, and Step Modulator can act as modulation sources.
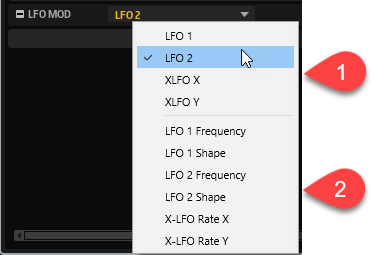
In the header of the modulation section, you find a pop-up menu. This menu has two functions:
-
If a section offers multiple sources, such as the Envelope and LFO sections, you can select a source to show its assignments.
-
If a source has parameters that can be addressed as modulation destinations, these are listed below the modulation sources, and you can select a parameter to show its assignments.
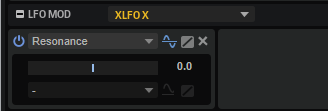
When a source is selected, its modulation row is shown.
You can jump to the assignment row of a modulated parameter by clicking on it in the source edit section. To go back to the assignment row of the source, click on the background of the edit section.
Destinations
Pitch, Osc, Filter, and Amp can act as modulation destinations.

- Select Modulation Destination
-
Allows you to specify the modulation destination. All available destinations are listed.
For example, for the Pitch section, the Pitch parameter is available. For the Oscillator sections, you can choose from different oscillators and oscillator parameters.
- Add Modulation
-
Once you have selected a modulation destination, the Add Modulation button becomes available. Click it to select a modulation source, and make further settings.
- Change Assignment Drag Icon
-
If you move the mouse over the field on the left, a drag icon appears, allowing you to change the modulation assignment. Click and drag the icon onto the parameter that you want to use as the new modulation destination.

If a section is hidden, you can drag the icon onto the corresponding section button to make it visible and then drag the icon onto a parameter to assign it.