Creating Templates From Groups or Selections
In the GUI Tree, you can create templates from a group or a selection. This is useful if you want to use this specific combination of elements as one entity on your macro pages.
Procedure
-
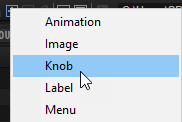
In the GUI Tree toolbar, click Create New Element and add a Text and a Knob element.
Result
When you use the template, it will show both controls in a single connection. They appear as a combined template parameter on the parent. You can now connect the template and both the Text and Knob values will react to parameter changes in HALion.
You can add default values for exported parameters by typing in a string or a value, even though the Export Property button is activated. As long as this string or value is not overwritten in the template instance, it remains active.
For an example, look at the exported label parameters of the library controls. You will see that they are all set to Label. This means that when you add such a template to your macro page, the control will show this default label. Setting the Label parameter of the template will overwrite the default value and show the new name instead.
After Completing This Task
You can now name the template and finalize it by exporting the required parameters, adding additional components, or setting up attachments, for example.