Correction Tab in the Audio Editor
-
In the Audio Editor, click Correction.

Scan Range
In this section, you can specify the range of audio to be scanned for errors.
- Scan Range
-
-
Entire File scans the whole audio file for errors.
-
Define as Current Selection searches for errors in the audio selection. Once defined, you can change the audio selection without altering this search area.
You can make an audio selection on individual channels. The selected channel is displayed in the Scan Range section.
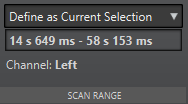
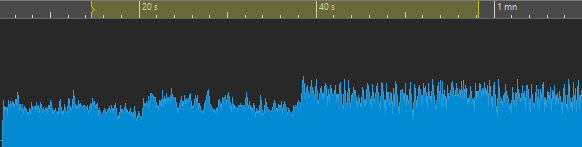
The search area indicator is displayed on the ruler.
-
Detection
In this section, you can specify how to detect errors.
- Presets
-
Allows you to open error detection presets and to access the Error Detection Configuration dialog, where you can define error detection presets.
To open the Error Detection Configuration dialog, click Edit.
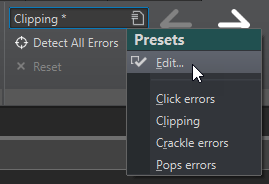
- Detect All Errors
-
Scans the specified range from the beginning to the end and creates pairs of error markers for every detected error, without performing any correction.
- Reset
-
Clears the detected error ranges previously memorized by WaveLab Pro after clicking Detect All Errors, and removes all error markers.
- Previous Error
-
Returns to the last detected error.
- Find Next Error
-
Selects the next error. If Detect All Errors was used to detect errors and create error markers, you can jump to the next error using Find Next Error.
If Detect All Errors was not used, clicking Find Next Error detects and selects the next error without creating error markers.
- Play
-
Starts playback of the current audio selection while taking into account any pre-roll and post-roll settings you made on the transport bar.
- Mark
-
Creates error markers at the beginning and the end of the audio selection, without performing any correction. If two channels are selected, a pair of error markers is created for each channel. If a single channel is selected, a pair of error markers is created for the selected channel only.
- Unmark
-
Deletes the error markers that surround the audio selection.
Correction
In this section, you can specify the method to be used for error correction.
- Correct Error
-
Restores the audio selection with the default correction method. You can select a different correction method from the pop-up menu.
- Error Correction Method
-
Allows you to select an error correction method.
-
Smooth Pencil Line is particularly suited for tiny clicks. This method corresponds to drawing an accurate line with a soft pencil. It replaces the corrupted sample with the pencil line.
-
Short Resynthesis is best suited for minor errors. WaveLab Pro analyzes the immediate surroundings of the error to find the most appropriate method of correction.
-
Inpainting is best suited for major errors. WaveLab Pro analyzes a larger portion of the audio file to find the most appropriate method of correction.
Inpainting replaces the corrupt samples using spectral inpainting. For error correction, spectral inpainting is applied to the whole frequency range with predefined settings. To access further inpainting options for correcting errors, use the Spectrum Editor.
-
- Correct All Marked Errors
-
Corrects all marked errors within the specified range.
- Previous Correction/Next Correction
-
Jumps to the previous/next correction marker pair.
Selection
This section displays information about the errors:
- Number of Errors
-
Displays the number of errors that were detected within the scan range.
- Error Severity
-
Specifies the likelihood of the selected error. For clipping errors, the error severity value refers to the number of succeeding samples of the same value. For example, an error severity of 4 means that at least four succeeding samples have the same value. For other error types, the higher the value, the more likely it is that the detected audio part contains an error.
In the Error Detection Configuration dialog, you can specify the error severity values that you want WaveLab Pro to take into account for detecting errors.
- Length
-
Displays the length of the selected error range.
Options
This section provides a range of parameters for playing back, viewing, and marking any detected errors.
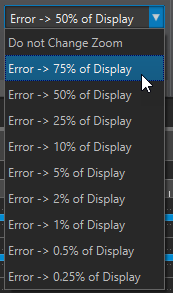
- Zoom Level
-
This pop-up menu allows you to specify the horizontal zoom level when displaying an error.
- Options
-
This pop-up menu contains the following options:
-
Auto-Play automatically plays back the error area after it has been detected or corrected.
-
Auto Vertical Zoom automatically zooms in on the error vertically when navigating between errors via the Previous Error and Find Next Error buttons.
-
Set Markers around Corrected Errors creates correction markers around the audio section whenever an error is corrected. This area can be larger than the marked error area when crossfades are performed by the corrector.
-
Remove Markers After Correction removes the error marker pair, every time an error is corrected.
-