Audio Performance Panel
The Audio Performance panel shows the audio processing load and the hard disk transfer rate. This allows you to ensure that you do not run into performance problems when working with a great number of tracks or small buffer sizes.
To open the Audio Performance panel, do one of the following:
-
Select on the menu bar.
-
Double-click the Audio Performance Meter display on the toolbar.
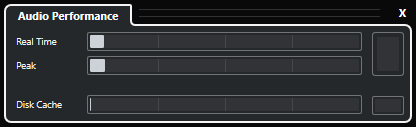
- Real Time
-
Shows the average load of all audio real-time processes.
- Peak
-
Shows the processing load in the real-time path of the audio engine. The higher this value, the higher the risk that dropouts occur.
- Processing Overload
-
The overload indicator indicates dropouts. Dropouts occur if the processing load exceeds 100% or if the audio engine is restarted due to the internal detection of excessive processing delay. For example, this can occur if the preprocessing buffer runs empty as a result of the real-time load exceeding the limits.
TipIf the overload indicator lights up, we recommend to increase the buffer size or decrease the number of audio channels that you record or play back simultaneously.
- Disk Cache
-
Shows the hard disk transfer load.
- Disk Cache Overload
-
The overload indicator to the right of the disk indicator lights up if the hard disk does not supply data fast enough.