Ducking Clips
Ducking happens when the level or send effect of one clip is modified through the presence of another signal on another track or channel. You can create ducking effects between clips on two adjacent tracks.
If you use the Ducking option, the presence of another clip on an adjacent track causes ducking.
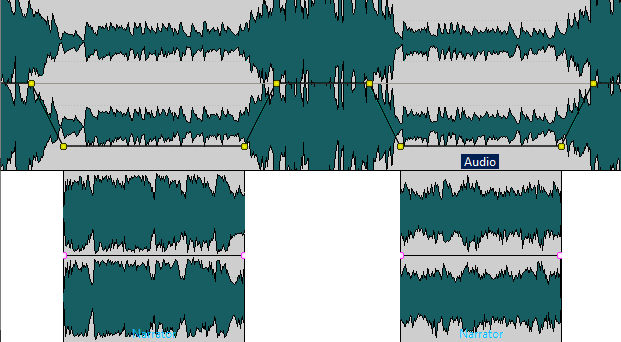
A typical application for ducking would be a music track with a commentary voice-over on another track. Whenever the commentary voice starts, the level of the music track is lowered by a specific level through automatically created level envelope curves.
You can also create a ducking effect for effect envelopes that are routed to a clip. Each clip plug-in has its independent envelope. When the envelope is all the way down, only the wet signal is applied. When the envelope is all the way up, the processed/wet signal is at its maximum.
-
The method of ducking clips is independent from clip modulation, though they share some concepts. Ducking clips is more flexible but needs more manual adjustments.
-
The clips that cause ducking must be positioned completely inside the time range of the clip to which ducking is applied.
-
If the clips that cause ducking contain silent passages, ducking does not function properly. These clips must be edited so that each phrase is a separate clip without any silence.
-
When Ducking is performed it is applied to one clip at a time. For example, if the music consists of several clips that have been spliced together, only one of the clips is ducked by the voice-over. To solve this issue, you can to repeat the function for each clip or use the Render function in the Master Section to create a specific (single) file from the separate clips and re-import this as a new clip in the audio montage.