About the lock layers
There are two ways to set up which type of object should belong to which lock layer:
Open the Preferences dialog from the File menu and select the Scores–Note Layer page.
This page lets you adjust the layer setting for each object type.
Right-click one of the layer buttons, (1-2-3), on the extended toolbar to bring up a pop-up menu, showing which object types are associated with that layer.
A checkmark for an object type means it belongs to that layer. If no checkmark is shown, you can select the object type on the menu to move it to that layer.
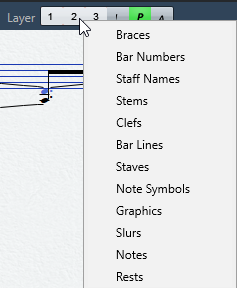
Figure: To lock a layer, click the corresponding layer button, so that it is disabled and not highlighted. You can only select or move objects whose Layer button is activated.
There are also “L” and “P” layer buttons, for the layout and project layer. Clicking these buttons allows you to lock the layout and project layers.