Audio Connections Tab
This tab allows you to specify how the internal input and output buses in WaveLab Cast are connected to your sound card and which device you want to use for audio playback and recording.
-
To open the Audio Connections tab, select .
Global Settings
- Audio Device
-
Allows you to select the audio device that you want to use for playback and recording audio. If you do not have a third-party audio card, you can select the Generic Low Latency driver or Built-in Audio (macOS only) options.
- Port Names
-
Opens the Audio Port Names dialog where you can specify a custom names for each input and output audio port.
- Control Panel
-
When you select an ASIO driver, the Control Panel button is activated. Click the button to open the settings application of your sound card, which is usually installed with the sound card. Depending on your sound card and driver, this provides settings for buffer size, digital formats, additional I/O connections, etc.
- Refresh
-
This button causes audio devices to be evaluated again to reflect device changes.
Playback Tab
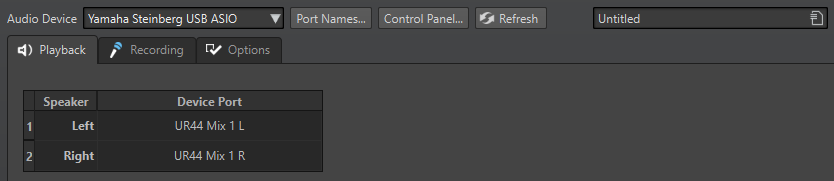
This tab allows you to select buses that are used for playback.
Recording Tab
The first time an audio device is detected, WaveLab Cast automatically assigns input buses. You can use this configuration or edit the input buses.
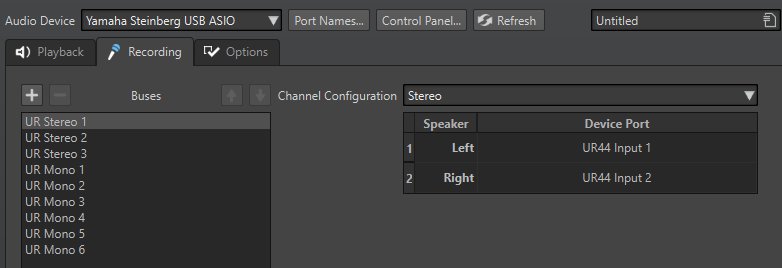
This tab allows you to select buses that are used for recording.
- Add Bus
-
Adds a new recording bus to the bus list.
- Remove Selected Bus
-
Removes the selected bus from the bus list.
- Move Bus Up/Move Bus Down
-
Moves the selected bus up or down in the bus list. This also modifies the bus order in the WaveLab Cast menus.
- Channel Configuration
-
Allows you to route recording buses to device ports. You can switch between a mono or a stereo channel configuration. In the table below the Channel Configuration menu, you can specify the Device Port for each channel of a recording bus.
- Buses List
-
Displays all buses. You can rename and move buses in the list. To rename a bus, double-click it and enter a new name.
Options Tab
This tab allows you to specify the number of buffers and the control driver functionality.
- ASIO-Guard
-
Increasing this value improves the elasticity of audio streaming to avoid dropouts. The higher the level, the higher the processing stability and audio processing performance. However, higher levels also lead to an increased ASIO-Guard latency and memory usage.
- Perform Short Fade In When Starting Playback
-
If this option is activated, a short fade in is performed when you start playback. This avoids clicks caused by waveforms that do not start on a zero-crossing point.
The fade is linear and either 10 milliseconds long or corresponds to the audio device block size if the block size is below 10 milliseconds.
- Perform Short Fade Out When Stopping Playback
-
If this option is activated, a short fade out is performed when you stop playback. This avoids clicks caused by waveforms that do not end on a zero-crossing point. This also discards any audio signal that is caused by latency and any tail that is caused by reverb plug-ins.
The fade is linear and either 10 milliseconds long or corresponds to the audio device block size if the block size is below 10 milliseconds.
- Release Driver when WaveLab Cast is in Background
-
If this option is activated, WaveLab Cast releases the ASIO driver when WaveLab Cast is in background. This gives the active application access to the audio card.
- Preferred Sample Rate
-
Allows you to specify the Preferred Sample Rate for playback.
- Sample Rate Change Timeout
-
After WaveLab Cast requests the audio device to operate at a new sample rate, the driver sends WaveLab Cast a feedback when the task has been completed.
Most drivers do not require you to specify a sample rate change timeout. However, some drivers send delayed feedback or no feedback at all. For these cases, you can specify a timeout.
After the time you specify here, WaveLab Cast assumes the sample rate was accepted and attempts to start playback or recording. However, if WaveLab Cast receives feedback from the driver, the timeout expires.
If you experience sample rate change issues, increase the timeout to 3 or more seconds. The ideal time is the shortest time that works.
The bottom right of the Master Section displays a progress bar while waiting for the driver feedback.