Spectrum Tab
The Spectrum tab allows you to use high-quality linear-phase filters to process a spectrum range selection for audio restoration and processing.
-
In the Audio Editor, click Spectrum.

Settings
The Settings section allows you to customize the Spectrogram and the Wavelet display.
- Spectrogram Options
-
Allows you to define how the frequency spectrum is displayed.
- Spectrum Edit Settings
-
Allows you to make settings for the Spectrogram and the Wavelet display.
To open the Spectrum Edit Settings dialog, click the arrow icon in the lower right of the Settings section.
-
If Show Information about Selections is activated and you hover over a spectrum selection, a tooltip in the Spectrogram and the Wavelet display shows you information about the selection.
-
If Show Magnitude Range Slider below Spectrum and Wavelet Display is activated, a slider below the Spectrogram and the Wavelet display allows you to specify the minimum and maximum spectrum values that are displayed. The minimum and maximum values represent frequency amplitudes. The left color of the color scheme determines the color of the amplitudes that are equal to or below the minimum value. The right color of the color scheme determines the color of the amplitudes that are equal to or above the maximum value.
-
Selection
The Selection section allows you to select the spectrum that you want to process. You can undo/redo all selection operations.
- Time Selection
-
This tool allows you to select a time range. This deactivates the spectrum editing functions.
- Rectangle Selection
-
This tool allows you to select a frequency range with fixed bottom and top frequencies.
- Play
-
This tool allows you to play back the audio file at the position where you click.
- Lasso Selection
-
This tool allows you to draw a free shape to make a spectrum selection.
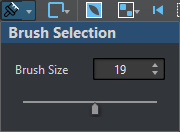
- Brush Selection
-
This tool allows you to paint a spectrum selection with a round brush. You can change the size of the brush.
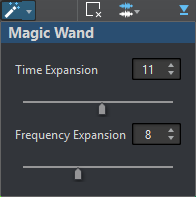
- Magic Wand
-
This tool allows you to click on the spectrogram and automatically select the surrounding spectral content that has a similar dB magnitude, according to the Time Expansion and Frequency Expansion values.
- Snap Mode
-
If this option is activated, the mouse cursor snaps to the spectral hot points when creating a selection with the Lasso Selection or the Rectangle Selection.
- Selection Modes
-
The selection options allow you to add and remove spectrum selections.
-
New Selection allows you to create a new selection in the spectrum while removing the old selection.
-
Add Selection allows you to add another selection to the spectrum while also keeping the old selections. You can also press Shift and click with the mouse to add a selection.
-
Remove From Selection allows you to remove parts of existing selections. You can also press Ctrl/Cmd-Shift and click with the mouse to remove parts of an existing selection.
You can click on a selection and move it. To only allow horizontal movement, Shift-click the selection and move the mouse. To only allow vertical movement, press Alt-Shift, click the selection, and move the mouse.
-
- Deselect All Regions
-
Deselects all frequency selections.
- Harmonics
-
Allows you to add harmonics to the spectrum selection while keeping the shape of the selection. By default, no harmonics are added.
- Edit Settings
-
Allows you to make settings for the Spectrum and the Wavelet display.
-
If Group Editing is activated and more than one region is selected, you can move and resize all selected regions simultaneously. You can also double-click a region to activate or deactivate group editing for this selection.
To remove a region from a group, right-click a region and select Deselect This Region.
To deselect all selected regions, double-click in the Spectrogram or the Wavelet display or press Esc.
When Group Editing is deactivated, you can individually group regions. Press Shift and click the regions that you want to group. You can then move or resize regions without changing other regions.
-
If Show Resizing Frame is activated, a frame encompasses the selected regions. This allows you to resize the selected regions.
-
- Channel Selection
-
Allows you to select if the spectrum selection should be on either the a Single Channel, the Channel Cluster, or on All Channels. The Channel Cluster option is only available for multichannel audio files.
NoteIf there is no spectrum selection, you can also press Shift and use one of the spectrum selection tools to make a selection on either the left or the right channel. If there is a spectrum selection, you can press Shift to add another selection.
- Zoom Selection
-
Zooms in on the selected region on both the time and frequency domain.
- Invert Selection
-
Inverts the frequency selection inside the selected time range.
- Clear All Selections
-
Removes all selections.
- Select until Start of File/Select until End of File
-
Extends the selection to the start/end of the audio file.
- Select until Top/Select until Bottom
-
Extends the selection to the top/bottom of the frequency axis.
- Share Selection
-
If this option is activated, you can share a selection among audio files of the same file group. This allows you to use the same selection in all audio files of a stem, for example. The selection must fit in the other audio file.
To share a selection in another audio file of the same file group, activate Share Selection, make a selection, and select another audio file tab.
NoteYou have to apply the processing to each audio file individually.
- Crop
-
Removes all audio outside of the selection.
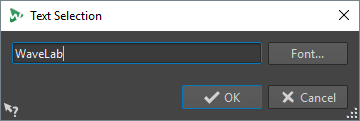
- Text Selection
-
Use the Rectangle Selection tool to select a rectangle that you want to replace with a selection that outlines text. This allows you to create a watermark in your spectrum to protect your audio, for example.
- Range Selection
-
Opens the Range Selection dialog. This dialog allows you to define selection ranges and frequency ranges very accurately.
Define and Copy
- Source at Cursor
-
Duplicates the selection rectangle at the current cursor position and defines it as source region for copy operations. This ensures that the selection to copy and the selected region that you want to edit have the same size. This allows you to quickly find the best source region to replace the destination region.
- Mix
-
Allows you to mix the source frequency with the target frequency. 100 % means all of the source region is copied to the target region.
- Copy
-
Copies the selected audio spectrum to the clipboard. If you close the audio file from which you copied the audio spectrum, the clipboard content is deleted. If you modify the audio spectrum in the source audio file, the clipboard is updated accordingly.
- Paste Exactly
-
If Source at Cursor is activated, Paste Exactly pastes the defined source region exactly.
If Source at Cursor is deactivated, Paste Exactly pastes the clipboard content.
- Paste Ambience
-
Pastes an average of the frequencies of the source region, blurring the original dynamics and pitches, and making the copied region appear less identifiable. Depending on the audio material, this may avoid a repetition effect.
Processing
- Processing Algorithm
-
The Processing Algorithm menu allows you to select the type of processing algorithm that is applied to the selected audio spectrum. The following options are available:
-
Change Level attenuates or boosts the level of the selected region according to the set gain.
-
Blur Peaks attenuates or boosts the level of the frequencies with the highest level in the selection according to the set gain. If the gain is set to a negative value, these frequencies are blurred. This is useful for removing acoustic feedback, for example.
-
Dispersion blurs the dynamics and frequency phases of the selected region according to the set gain without changing the frequency content.
-
Master Section allows you to render Master Section plug-ins to the selection.
-
Fade Out gradually filters out the frequencies in the region along the time axis, creating a fade out. The Fade Out Shape option in the Processing section allows you to select a fade out shape.
-
Fade In gradually lets pass frequencies in the region along the time axis, creating a fade in. The Fade In Shape option in the Processing section allows you to select a fade in shape.
-
Fade Out then Fade In lets the frequencies fade out and fade in again. The Fade In Shape and Fade Out Shape options in the Processing section allow you to select the shapes of the fades.
-
Fade In then Fade Out lets the frequencies fade in and fade out again. The Fade In Shape and Fade Out Shape options in the Processing section allow you to select the shapes of the fades.
-
The Noise Mixing options allow you to mix in different types of noise to the spectrum selection according to the set gain.
-
Transcode Picture allows you to insert a picture into your spectrogram to add a watermark, for example.
NoteIt is recommended to display the spectrum with a linear scale, because the picture scaling is frequency-linear based. You can activate the linear frequency scale in the Spectrogram Options dialog.
-
- Gain
-
Determines the level of the filter processing. Negative gain settings attenuate the effect, positive gain settings boost the effect.
- Fade In
-
Allows you to select a fade in shape for the fade processing algorithms.
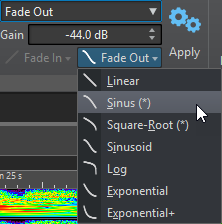
- Fade Out
-
Allows you to select a fade out shape for the fade processing algorithms.
- Apply
-
Applies the selected processing algorithm.
- Audio Inpainting
-
The Audio Inpainting algorithm allows you to remove or attenuate sounds in the spectrum. Audio inpainting restores a spectrum selection based on the content to the left and to the right of the selection rectangle.
The following options are available:
-
If Show Surrounding Region is activated, you can customize the length of the surrounding regions that the Audio Inpainting function takes into account. You can resize the surrounding region with the mouse cursor. Only the active region is customized.
-
Bands allows you to define the number of frequency bands that the algorithm works on. If you work on rhythmic content or modify high frequencies, use low values. If you work on harmonic content or modify low frequencies, use high values.
-
Precision allows you to specify the precision of the audio inpainting. Low precision results in a blurrier spectrum. High precision results in a more detailed spectrum. Higher precision settings increase the processing time.
-
Persistence of Original allows you to specify how much of the original spectrum is kept when audio inpainting is applied to the content inside the selection rectangle. To ignore the content inside the selection rectangle, set the value to 0%. To attenuate the original spectrum inside the selection rectangle, set the value to 100%.
-
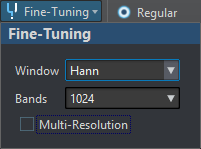
- Fine-Tuning
-
Allows you to control the quality of the audio processing.
-
Window allows you to select the smoothing shape that reduces the artifacts of the audio processing most effectively.
-
Bands allows you to define the number of frequency bands that the algorithm will work on. If you work on rhythmic content, use low values. If you work on harmonic content, use high values. Use low values if you modify high frequencies and bigger values if you modify low frequencies.
-
If Multiresolution is activated, multiple band settings are used at the same time. This option increases the processing time.
-
- Smoothing
-
The Smoothing options allow you to create a crossfade between the processed and the unprocessed signal in the time and in the frequency domain.
The following options are available:
-
Time allows you to set the duration of the crossfade between the processed and the unprocessed signal in the time domain.
-
Frequencies allows you to create a crossfade in the frequency domain between the processed and the unprocessed section. If the value is high, the selected region contains much of the unprocessed signal near the frequency edges.
-
If Outside is activated, the smoothing effect is applied to the area outside of the selection.
-
If Inside is activated, the smoothing effect is applied to the area inside of the selection.
-
- Presets
-
Allows you to save and restore spectrum processing presets.
Playback
- Regular
-
If this option is activated, all frequencies play back without any kind of filtering when you press Play.
- Solo Selection
-
If this option is activated, only the selected spectrum is played back when you press Play.
- Mute Selection
-
If this option is activated, the selected spectrum is muted when you press Play.