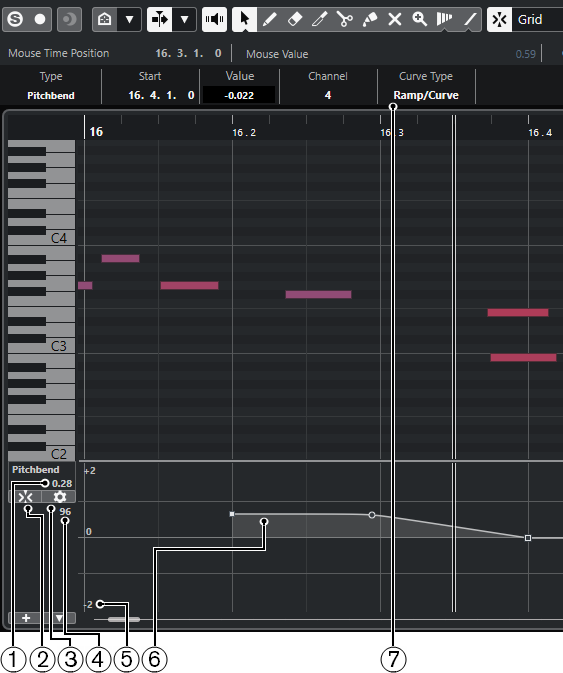
Pitchbend Controller Lanes
Pitchbend controller lanes allow you to add and edit pitchbend controller events.
-
To add a pitchbend controller lane, open the Controller Selection and Functions menu, and select Pitchbend.
-
Value at project cursor
Displays the pitchbend value at the project cursor position. What exactly is shown depends on the Show Semitones Grid setting in the Grid Settings pane:
-
If Show Semitones Grid is activated, this value shows the semitones value at the project cursor position. The range goes from +96 semitones to -96 semitones. The value is shown in semitones and cents.
-
If Show Semitones Grid is deactivated, this value shows the pitchbend MIDI value at the project cursor position. The range goes from +8191 steps to -8192 steps.
-
-
Snap Pitchbend Events
Restricts vertical movement and positioning of controller events to the semitones grid. By default, activating Snap Pitchbend Events also activates Show Semitones Grid to show the grid that the events are snapping to.
NoteSnap Pitchbend Events is not effective in the controller event editor.
-
Set up Grid
Opens the Grid Settings pane that allows you to set up the semitones grid for the pitchbend controller lane.
-
Controller value from MIDI device
This value shows up if you input MIDI data for this controller lane from your MIDI device.
-
Semitones grid
The semitones grid shows the semitone values. The amount of grid lines and their width depends on the settings for Pitchbend Range: Down and Pitchbend Range: Up. By default, the range is set to +/- 2 semitones, that is, a major second.
NoteYou can show the grid even if Snap Pitchbend Events is deactivated.
-
Controller curve
The pitchbend controller curve.
-
Curve Type field
Shows the controller curve type. You can set this to Step or to Ramp/Curve.