Importing a CSV File

You can import the data that is contained in a CSV file to marker tracks.

Procedure

  1. Optional: Create a new project.

    This is not strictly necessary, but helps you keep track of things.

  2. Set up the project frame rate according to the frame rate of the CSV file that you want to import.

    For CSV import, Nuendo supports the frame rates 24 fps, 25 fps, 29.97 fps, 29.97 dfps, 30 fps, and 30 dfps.

  3. Select File > Import > CSV Marker.
  4. Select the file that you want to import and click Open.
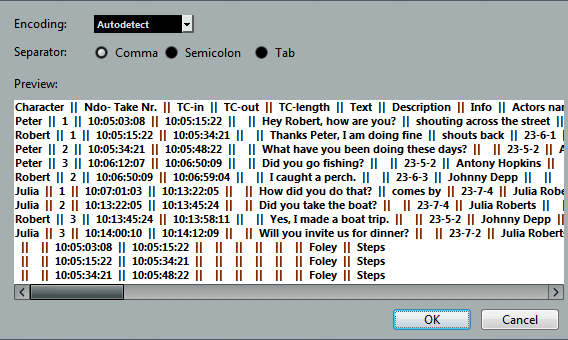
  5. In the CSV Import - Encoding dialog, make your changes and click OK to apply them.

    If you are not sure which encoding method was used, select the Autodetect option.

    Note

    The Preview section gives you visual feedback of how Nuendo interprets the data contained in the CSV file. If the data is not displayed correctly, try another encoding method.

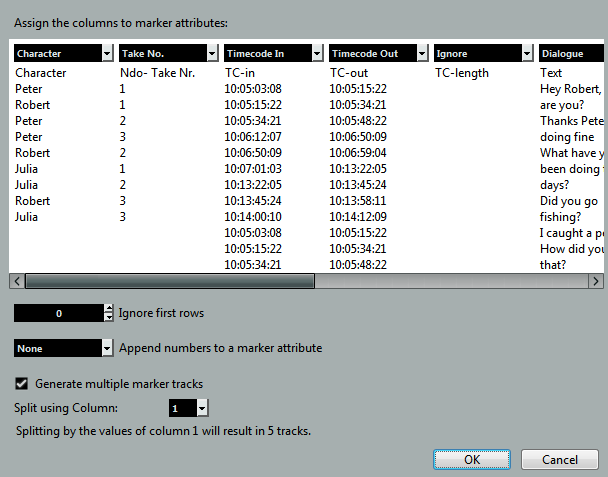
  6. In the CSV Import - Attribute Selection dialog, make your changes and click OK to apply them.
    Note

    At least the attribute for Timecode in has to be assigned.

  7. In the Import Options dialog, select the tracks that you want to import by activating the corresponding tracks in the Import column to the left, or select all tracks by clicking Select All Tracks.
  8. Click OK to import the CSV file and close the dialog.

Result

The data contained in the CSV file is imported into marker tracks in Nuendo.