Preferences Dialog
The Plug-in Preferences dialog has several pages on which you can make settings.
MIDI Page
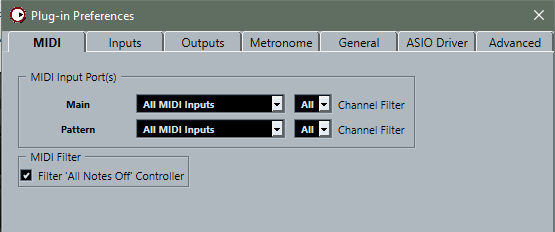
On the MIDI Routing page, you can access the Main and Pattern input ports and make routing settings.
- MIDI Input Ports
-
Use this pop-up menu to specify a MIDI input.
- Channel Filter
-
Determines whether MIDI events are recorded on all MIDI channels, or only on one specific channel.
- Filter ‘All Notes Off’ Controller
-
Activate this parameter to avoid unwanted “All Notes Off” messages. Such messages are sent by some keyboards when the last key is released. This causes Groove Agent to stop playback, even when the sustain pedal is still in use.
Inputs Page

On the Inputs page, you can specify which inputs of the audio interface are connected to Groove Agent’s stereo input.
This is the input that can be selected from the Sample Recorder.
Outputs Page
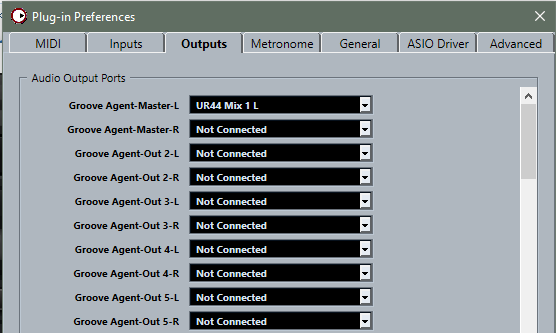
You can use the Audio Output Ports pop-up menus to assign different audio outputs. Groove Agent supports 16 channels. You can assign different audio outputs for each channel.
-
To map an output to a channel, select it from the pop-up menu.
-
To set the front and rear channels to incrementing audio output ports, hold down Shift, and select an audio output.
-
To assign the audio outputs to the front and rear channels in pairs, hold down Alt/Opt-Shift, and select an audio output.
Metronome Page

On the Metronome page, a number of settings can be made regarding the use of a metronome.
- Mode
-
Activates/Deactivates the metronome or sets it to Count In mode.
- Accent
-
Accentuates the first beat of each bar.
- Level
-
Adjusts the volume of the metronome.
- Connections
-
Allows you to select a separate stereo output for the metronome.
General Page
- Don’t prompt for confirmation when quitting Groove Agent
-
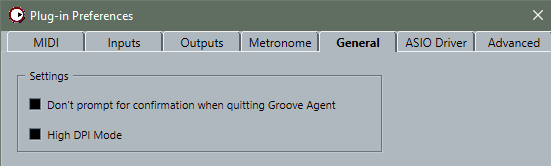
If you want the plug-in to close without prompting when you quit the program, activate Don’t prompt for confirmation when quitting Groove Agent.
- High DPI Mode
-
-
If High DPI Mode is activated, the plug-in uses high-resolution bitmaps when it is displayed with a scaling of 150% or higher on a high-resolution monitor, such as 4K (UHD), 5K, etc. This allows for sharper images on high-resolution displays.
NoteWindows systems currently only support scaling factors that are multiples of 100. For example, if you use a scaling factor of 150%, in , the scaling factor is set to 200%.
High DPI Mode may not be compatible with some combinations of software and hardware. If you experience display issues with your setup, you can deactivate High DPI Mode.
-
If High DPI Mode is deactivated, the native monitor resolution is used.
-
ASIO Driver Page
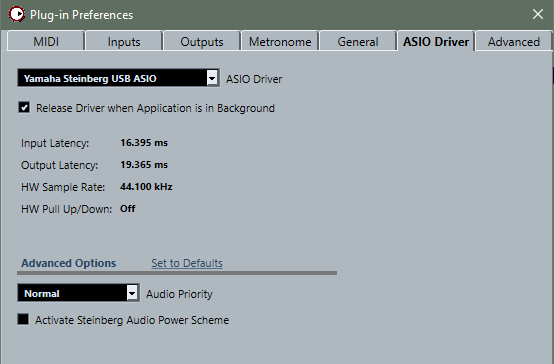
From the ASIO Driver pop-up menu, you can select your audio hardware driver.
- Release Driver when Application is in Background
-
Activate this option if you plan to use several audio applications simultaneously.
- Input Latency/Output Latency
-
The input and output latency values for your audio hardware are displayed. Latency is the amount of time it takes for your system to respond to any messages that are sent to it. High latency results in a noticeable delay between pressing a key and hearing the sound.
You can change the latency via the Buffer Size parameter in the control panel for your driver, which you open by clicking the Control Panel button on the Advanced tab.
- Sample Rate
-
Below the latency values, the sample rate for the connected audio hardware is displayed.
- Audio Priority
-
Determines which of the Groove Agent processes gains priority when accessing processor resources on your computer.
-
In Normal mode, non-audio processes and audio playback get roughly equal priorities.
-
In Boost mode, audio precedes MIDI in priority. Try this mode if audio playback problems occur when playing back MIDI and audio material.
-
- Activate Steinberg Audio Power Scheme
-
If this option is activated, all power safe modes that have an impact on real time processing are deactivated. Note that this is only effective for very low latencies, and that it increases the power consumption.
Advanced Page
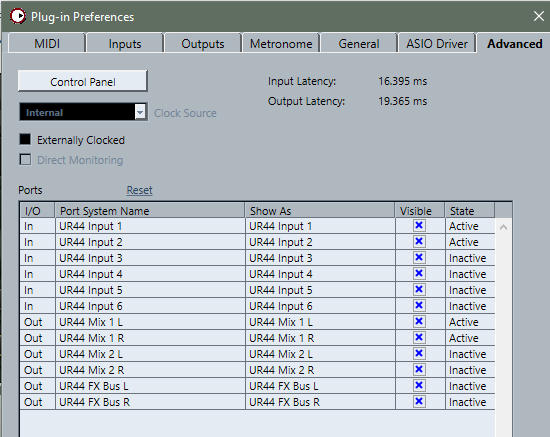
Once you have selected the driver, you can specify which inputs and outputs to use and name these on the Advanced page. Click the Control Panel button to open the control panel for the audio hardware, and adjust the settings as recommended by the audio hardware manufacturer.