Recorder Tab
The Recorder tab contains the Sample Recorder, which allows for live sampling in Groove Agent. You can sample the sounds of another plug-in and map them to the pads/keyboard, reduce CPU load by creating one sample from an audio event that contains fades, processing, etc., or quickly create sounds from events in your sequencer projects and edit them further in Groove Agent, for example.
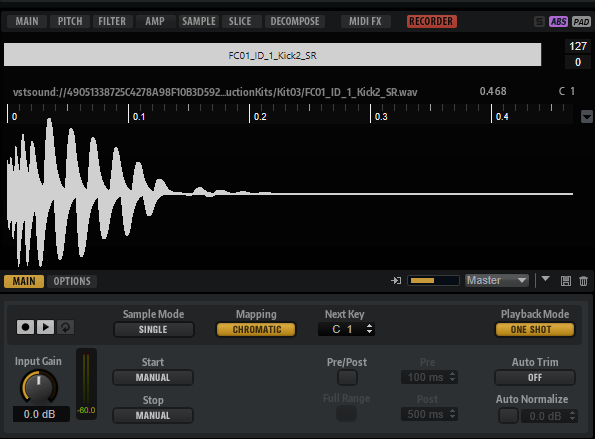
Waveform Display
During recording, the waveform display shows the sample waveform. When recording is stopped, it shows the sample that was created. If nothing has been recorded yet, the waveform display shows the waveform of the sample zone that is selected in the mapping view.
The ruler above the display can be switched between Beats, Seconds, and Samples.
Main Tab
- Record/Record Enable
-
The behavior of this button depends on the Record Start Trigger setting.
-
In Manual mode, this button starts/stops recording.
-
In the Audio Threshold, MIDI Note-On, and MIDI Note-Off modes, this button record-enables the Sample Recorder. This means that recording starts as soon as the audio signal exceeds the threshold or a MIDI note-on or note-off event is received.
NoteThe Sample Recorder always records the sample for the selected pad. Every recording creates a new sample.
-
- Play/Stop
-
The behavior of this button depends on the Record Start Trigger setting in the Trigger section.
-
In Manual mode, the Play/Stop button starts/stops playback of the recorded sample.
-
In the Audio Threshold, MIDI Note-On, and MIDI Note-Off modes, the Play/Stop button starts/stops recording.
-
- Reset Recording
-
Removes the current recording, allowing you to start over.
- Input Gain
-
Adjusts the input level for the recording.
- Sample Mode
-
Determines whether you can make a single recording or record multiple samples.
-
In Single mode, you can only record one sample.
-
In Auto-Next mode, you can record multiple samples in a row. This is particularly useful when working with the Audio Threshold, MIDI Note-On, and MIDI Note-Off modes. Every time that recording is stopped, the Sample Recorder reverts to its record-enabled state and starts recording again as soon as the condition that triggers recording is met.
-
- Mapping
-
When you record multiple samples, you can specify how they are mapped.
-
As played can be used when the recording start is triggered by MIDI notes. The played notes determine the root key of the sample.
-
Fixed maps all samples to the key that is specified in the Next Key text field.
-
Chromatic maps the samples chromatically to the keys on the keyboard, starting with the key that is specified in the Next Key text field.
-
White Keys maps the samples to the white keys on the keyboard, starting with the key that is specified in the Next Key text field.
-
Black Keys maps the samples to the black keys on the keyboard, starting with the key that is specified in the Next Key text field.
-
- Next Key
-
Specifies the initial key or the fixed key for the sample mapping, depending on the selection you made on the Mapping pop-up menu.
- Playback Mode
-
Specifies how the sample is played back.
-
In Normal mode, the sample starts playing when a key is triggered and stops when the key is released.
-
In One Shot mode, the sample is played back in its entirety, any note-off events are ignored.
-
In Loop mode, the sample is played back in a loop. The loop is set up so that loop start and end correspond to the start and end of the sample.
-
- Record Start Trigger
-
Determines what starts the recording.
-
If Manual is selected, recording starts when you click the Record/Record Enable button.
-
If Audio Threshold is selected, recording starts as soon as the audio signal exceeds the specified threshold.
-
If MIDI Note-On is selected, recording starts when a MIDI note-on event is received on the specified channel and port.
-
If MIDI Note-Off is selected, recording starts when a MIDI note-off event is received on the specified channel and port.
-
- Record Stop Trigger
-
Determines what stops the recording.
-
If Manual is selected, recording stops when you click the Record/Record Enable button.
-
If Audio Threshold is selected, recording stops as soon as the audio signal falls below the specified threshold.
-
If MIDI Note-Off is selected, the following applies:
If Trigger – Start is set to MIDI Note-On, recording stops when the corresponding MIDI note-off is received on the specified channel and port.
NoteOnly this specific note-off event stops the recording. Any other MIDI notes can be played and the resulting audio will be recorded.
If Trigger – Start is set to a setting other than MIDI Note-On, recording stops when a MIDI note-off event is received on the specified port.
-
If MIDI Note-On is selected, recording stops when a MIDI note-on event is received on the specified channel and port.
NoteAny note that is sent on the specified channel and port stops the recording.
-
Fixed Duration allows you to specify the duration for the recording, either as absolute recording time or as recording time in beats, in sync to the project tempo.
-
- Pre/Post Record
-
Allows you to start the recording slightly ahead or let it continue for a bit after the recording stop trigger is received. This way, you can capture transients or reverb tails that are slightly lower than the set threshold, or perform fine-adjustments of the start and end regions of the sample at a later stage, for example.
-
Full Range – If this option is activated, the pre- and post-record portions of the recording span the entire sample range.
-
Pre sets the time that is recorded before the recording is triggered. The sample start marker of the zone is set to the exact trigger moment. The pre-record time can then be used to adjust the start of the sample.
-
Post sets the time that is recorded after the trigger event has stopped the recording. The sample end marker of the zone is set to the exact trigger moment. The post-record time can then be used to adjust the end of the sample.
NoteWhen you record multiple samples, Post Record is automatically stopped 50 ms after a new sample recording has started, to avoid overlapping recordings.
-
- Auto Trim
-
Zero Crossing moves the sample start and end markers automatically to the nearest zero crossing before the start and after the end of the recording.
Silence automatically removes any silence before the audio starts and after it ends. The sample start and end markers are set accordingly.
Manual Recording
If you set Auto Trim to Off, manually start recording, and play a note on your instrument, the recording contains silence before and after the recorded audio. This means that you must adjust the sample start and end markers manually.
If you activate Auto Trim, the sample start and end markers are automatically set to positions directly before the start and after the end of the audio.
Recording With an Audio Threshold and Pre/Post Record
Set Auto Trim to Off, specify an audio threshold for both the start and the stop trigger for the recording, and activate and set up Pre/Post Record. Now, click the Record/Record Enable button to enable recording and play a note on your instrument.
As soon as the signal exceeds the Start threshold, recording starts and when the audio level falls below the Stop threshold, it ends.
The resulting recording contains silence before and after the audio recording. This means that you must adjust the sample start and end markers manually.
If you activate Auto Trim and repeat the same procedure, the sample start and end markers are automatically moved into the pre and post record range to match the effective start and end of the audio when the recording is finished.
Auto Trim only affects the sample start and end markers and leaves the audio file as it is, including the pre and post record time.
Options Tab

- Channel
-
-
As Source adapts the number of channels automatically to the number of channels of the source.
-
Mono records mono samples.
-
- Sample Rate
-
Specifies the sample rate for recorded samples. You can choose between a selection of predefined sample rates or use the sample rate that is used in the project of your host application.
- Bit Depth
-
Specifies the bit depth for the recorded samples.
- Format
-
Specifies the file format for the recorded samples.
- Project
-
Activate this button to record the sample files into the current project folder of the Steinberg DAW.
- Record Folder
-
Allows you to specify the destination folder for the recorded sample files. If the Project button is activated, you can define a subfolder or path inside the project folder.
- Naming Scheme
-
Allows you to set up a naming scheme for the recorded samples. The file name can be a combination of a text and a selection of predefined elements.
-
You can enter the text for the file name in the text field.
-
To add one of the predefined elements to the naming scheme, click the triangle to the left and select it from the pop-up menu.
-
You can modify the naming scheme by cutting, copying, and pasting in the text field.
The resulting name is displayed as an example above the text field.
NoteTo avoid duplicate file names, a continuous counter is automatically added to the file name.
-