Project window
Dorico for iPad’s main project window allows you to access all the options and tools you need to work on a project.
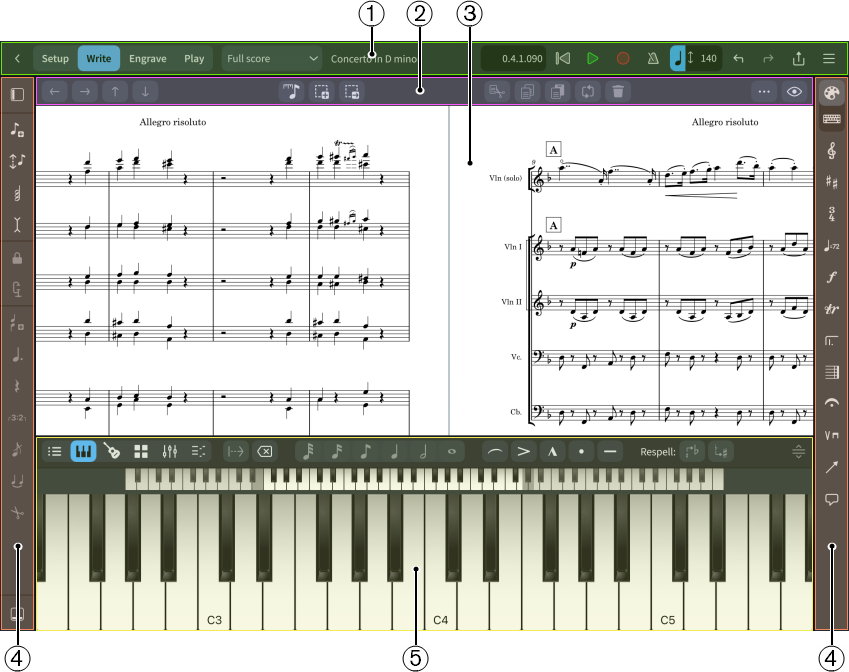
The project window comprises the following areas:
-
Toolbar
Allows you to access the modes, other layouts, the main transport options, print and export options, and options dialogs. Also allows you to undo and redo actions.
-
Secondary toolbar
Contains different common options depending on the mode, such as Add to Selection
 and Delete
 . Available in Write mode and Engrave mode.
 -
Project start area/Music area/Event display
The central part of the project window where you work on your project. When you set up a new empty project, this area shows the project start area that allows you to add your first players. Once you have added a player or an ensemble, this area becomes the music area that shows the music notation of the currently selected layout.
In Play mode, this area contains an event display that shows the effects of manipulating the playback of your music.
-
Toolboxes
Toolboxes provide access to items and tools that you can use to input and edit your music. Different toolboxes contain different items and tools according to the mode.
-
Zones
Zones on the left, right, and lower edges of the project window contain panels that provide the notes, notations, and functions that you need to create and edit your music. Different panels are available in each zone according to the mode. In Dorico for iPad, you can show either the right and/or left zones simultaneously, or the lower zone on its own.