Looking at the parts
You are now almost at the end of this guide, and are hopefully feeling ready to work on your own projects! So let’s take this opportunity to do a quick tour of part layouts, what they share with the full score, and what is unique to each part.
Firstly, a quick reminder of what layouts are and how they work in Dorico:
Layouts combine the musical content of flows and players with page formatting to produce paginated music notation. You can have any number of layouts in a single project with any combination of players and flows. For example, you can include a rehearsal piano player in the vocal score layout without showing piano staves in the full score. Layouts share musical content (such as the notes each instrument plays), but can have independent formatting (such as system breaks and page turns in different places). Full score and part layouts have different default settings; for example, multi-bar rests are automatically shown in parts, but not in scores.
This means that literal part “extraction”, where each instrumental part is saved to a separate file, is not necessary: you can keep your full score, all instrumental parts, and any other layouts you need all in one Dorico project, while retaining the flexibility to edit each one independently.
Due to the limitation of two players per project in Dorico SE, and how you have set up your project(s) to complete the previous tasks, you may need to open a different part layout than described here. However, the principles of how to look at and edit parts remain the same in all product versions.
Procedure
-
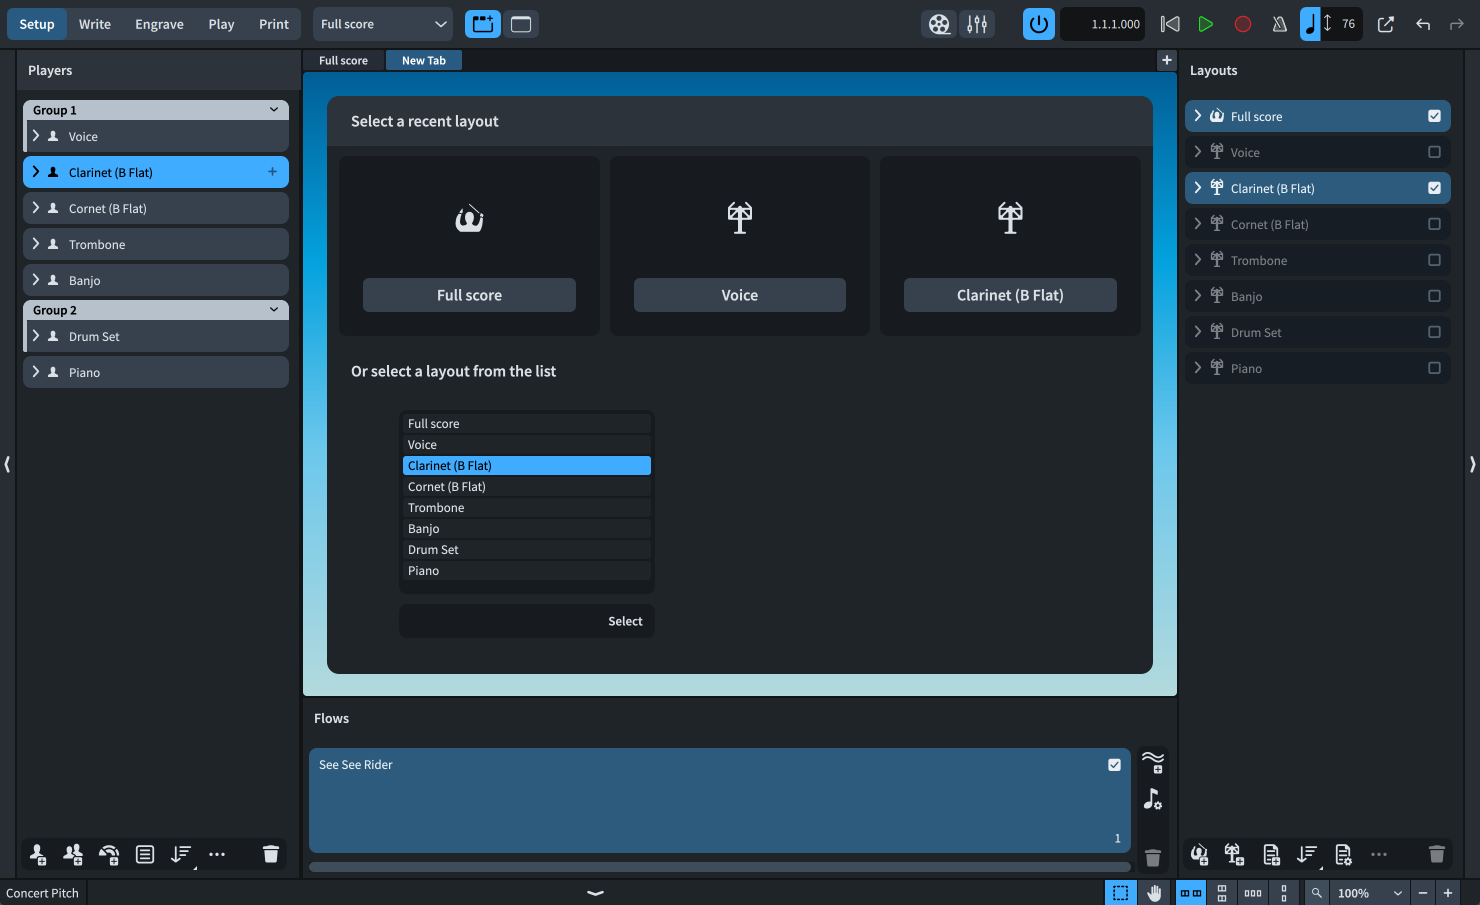
Press Ctrl/Cmd-T to open a new tab.
-
If the tab bar was hidden, it is now shown.
-
You can also click New Tab
 at the right end of the tab bar.
-
-
In the list at the bottom of the new tab, double-click Clarinet (B Flat) to open the Clarinet part layout.
-
You can also select it from the layout selector in the toolbar.
-
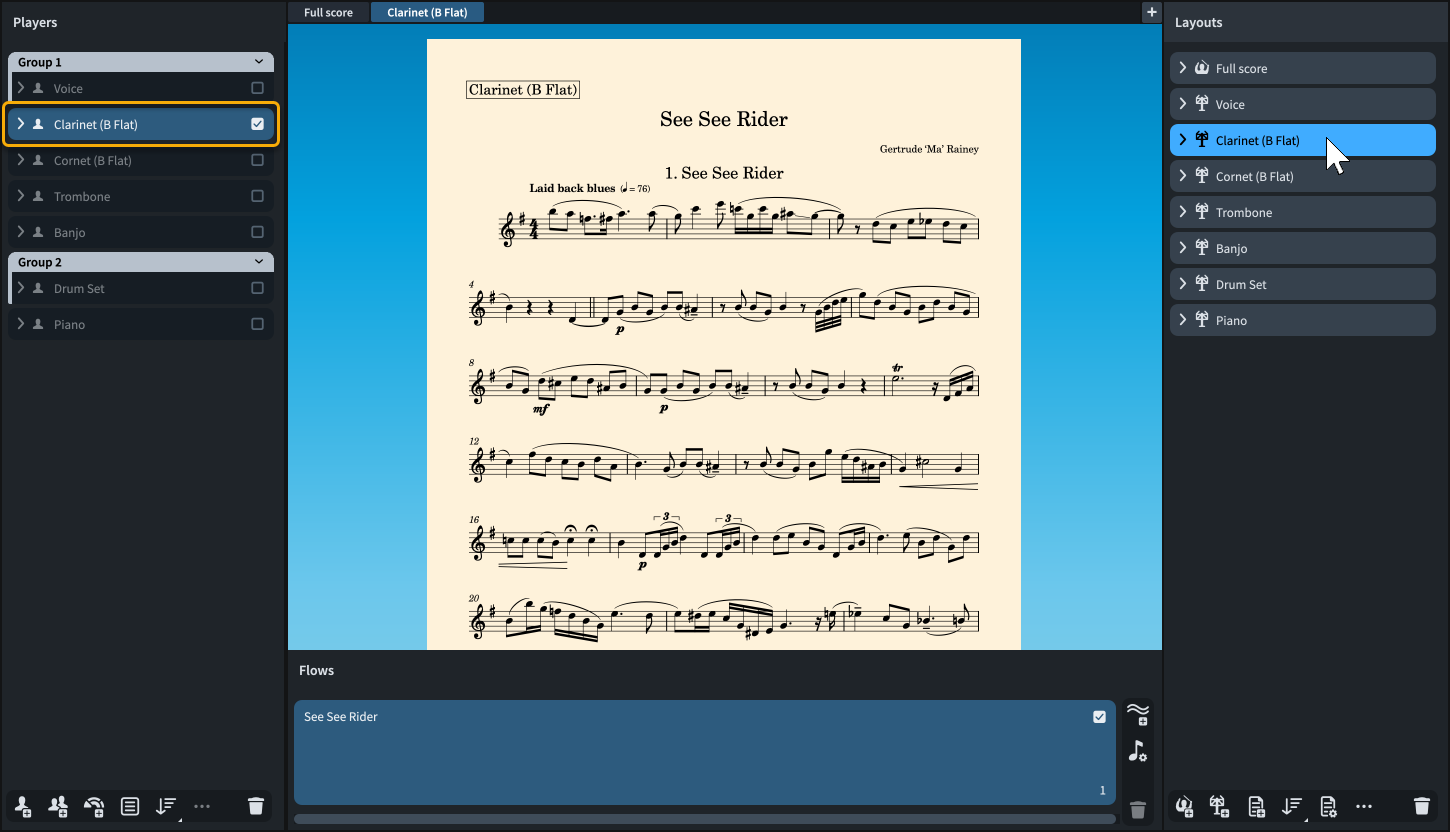
You are now viewing the Clarinet part layout. It contains only the music belonging to the Clarinet player. To check this, select the Clarinet part in the Layouts panel on the right, then look at the Players panel on the left: only the Clarinet player has an active checkbox, meaning only that player is assigned to the Clarinet part layout.
-
-
In the tab bar, click the Full score tab to bring it into view in the music area.
-
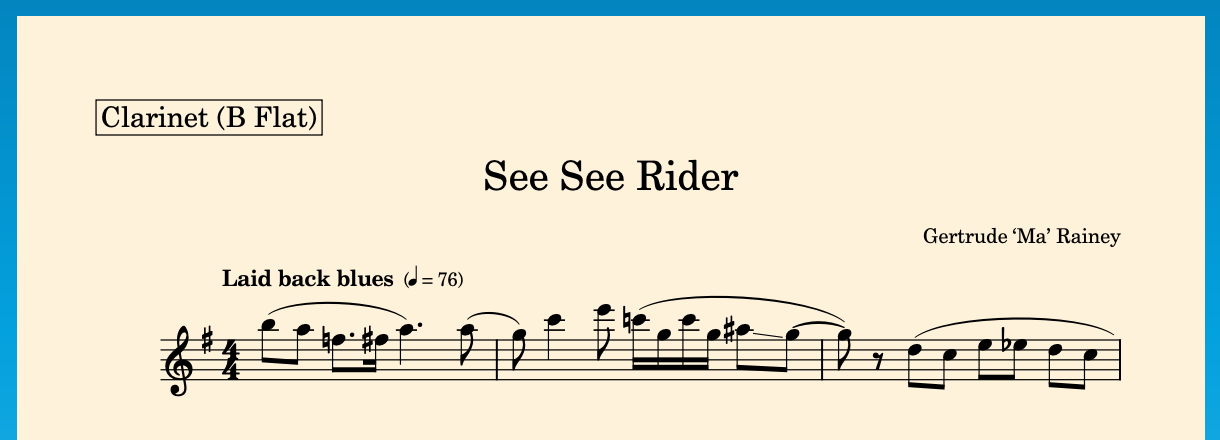
A few key differences are probably obvious: by default in Dorico, part layouts have cream pages, whereas scores have white pages; the Clarinet part has no staff labels, but the full score has abbreviated staff labels on every system; the first system in the Clarinet part is slightly indented; the staff size is larger in the Clarinet part; and the casting off is different, namely which bars appear in each system.
-
Many of these differences follow generally accepted practices: part layouts require staves to be large enough to read comfortably from a music stand, but because they typically only show the music for one instrument, they don’t need the staff labels that are helpful in full scores. These are some of the settings you can adjust for each layout independently.
-
Another aspect of layouts that is independent is the casting off, which you can now try changing.
-
-
Do one of the following:
-
If you have Dorico Pro or Dorico Elements, press Ctrl/Cmd-3 to switch to Engrave mode.
-
If you have Dorico SE, press Ctrl/Cmd-2 to switch to Write mode.
-
- In the full score layout, locate bar 11 and remember where it appears; that is, in the middle of the top system on page 2.
- In the tab bar, click the Clarinet tab to bring it into view in the music area.
-
Select the note at the start of bar 11.

-
Insert a system break in one of the following ways:
-
If you have Dorico Pro or Dorico Elements, press Shift-S.
-
If you have Dorico SE, choose .

-
System breaks that you have inserted manually appear as signposts. You can hide/show some or all signposts from the menu.
-
Bar 11 is now at the start of a new system. But what has happened to bar 11 in the score?
-
-
In the tab bar, click the Full score tab to bring it into view in the music area.
-
Bar 11 is exactly where you left it, in the middle of the top system on page 2.

-
System and frame breaks are layout-specific, meaning that inserting them in one layout doesn’t affect any other layouts.
-
There’s one more key layout-specific aspect of how music can appear that we would like to introduce you to.
-
- If the lower zone is not shown, press Ctrl/Cmd-8 to show it.
-
Make sure Properties
 is selected in the lower zone toolbar, so you can access the Properties panel.
-
In the Properties panel toolbar, choose Locally for Set local properties.

-
This controls the property scope, allowing you to determine whether subsequent local properties you change take effect only in the current layout (Locally), or in all layouts (Globally).
-
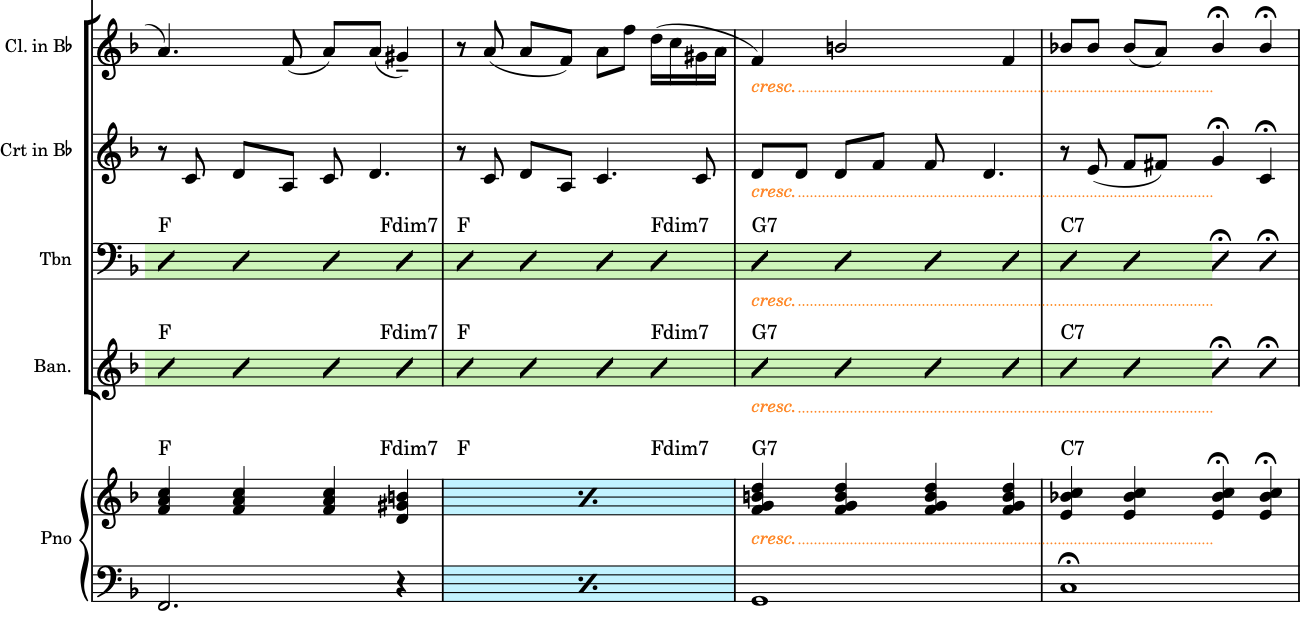
- Still in the full score layout, Ctrl/Cmd-click all the crescendo hairpins in bar 15.
- In the Properties panel, activate Gradual style in the Dynamics group.
-
Select cresc.... from the menu.
-
All the selected hairpins now appear as cresc. text with dotted continuation lines. But what if you wanted to keep the hairpins in the part layouts?
-
-
In the tab bar, click the Clarinet tab to bring it into view in the music area.

-
Because Gradual style is a local property, and the property scope was set to Locally when you changed it in the full score, that change only affected the score, leaving the appearance of the selected crescendos in the corresponding part layouts untouched.
-
Let’s check the rest of the parts.
-
-
Press Shift-Alt/Opt-] to switch to viewing the next layout in the current tab.
-
The next layout is the Cornet, and its crescendo in bar 15 is also still a hairpin.
-
-
Keep pressing Shift-Alt/Opt-] to cycle through the rest of the parts and check their hairpins, until you reach the Piano.
-
If you want to cycle back the other way, press Shift-Alt/Opt-[.
-
You can also select an item on a staff, then press W to switch to/from the corresponding part/score.
-
As you looked through all the parts, you may have noticed they all had a redundant flow heading below the project title at the top of the page, displaying “1. See See Rider”. Although you learned how to hide flow headings in an earlier task, that only affected one layout.
-
- Press Ctrl/Cmd-Shift-L to open Layout Options.
-
In the Layouts list on the right of the dialog, click Select All Part Layouts
 in the action bar at the bottom.
-
This allows you to hide flow headings in all part layouts at the same time. When you change options in Layout Options, you’re doing so for whichever layouts are selected on the right of the dialog.
-
You can also select multiple layouts by clicking and dragging across them, Shift-clicking adjacent layouts, and Ctrl/Cmd-clicking individual layouts.
-
- In the category list, click Page Setup.
- In the Flows section, choose Never for Show flow headings.
-
Click Apply, then Close.
-
In one go, you’ve hidden all flow headings in all part layouts. You could do the same if you wanted to, for example, show bar numbers every bar, change the staff size, change the default gaps between systems, and so on.
-
Result
You have:
-
Opened a second tab
-
Compared a part against the score
-
Inserted a system break into a part without affecting the score
-
Changed local properties in the score without affecting the parts
-
Cycled through layouts using key commands
-
Changed a Layout Option for multiple selected layouts