Moving individual staves/systems vertically
You can change the spacing of individual staves, including ossia staves, by changing the vertical position of individual staves and systems independently of your project-wide settings.
We recommend that you add extra pages and finish laying out your pages before moving individual staves. Individual staff spacing changes are automatically deleted if the page on which they occur or the rhythmic position at the start of the system changes.
Procedure
-
In the Engrave toolbox, activate Staff Spacing.

-
Select one of the following on each staff/system you want to move vertically:
-
Staff spacing handle

-
System spacing handle

Note-
You can switch between having a staff or system spacing handle selected by pressing Tab.
-
When using the mouse, you can only move one staff/system at a time.
-
Result
The vertical position of the selected staves/systems is changed. The color of the handles changes to indicate that you have moved them.
Example
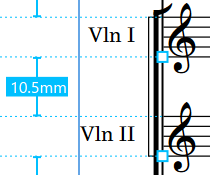
Figure: Staff spacing handles at their default positions |

Figure: The second staff has been moved upwards |