MixConsole Window
You can open the MixConsole in a separate window.
To open the MixConsole, do one of the following:
-
Press F3.
-
Select .
-
On the Project window toolbar, click Open MixConsole.
NoteThis is only visible on the toolbar if the Media & MixConsole Windows section is activated.
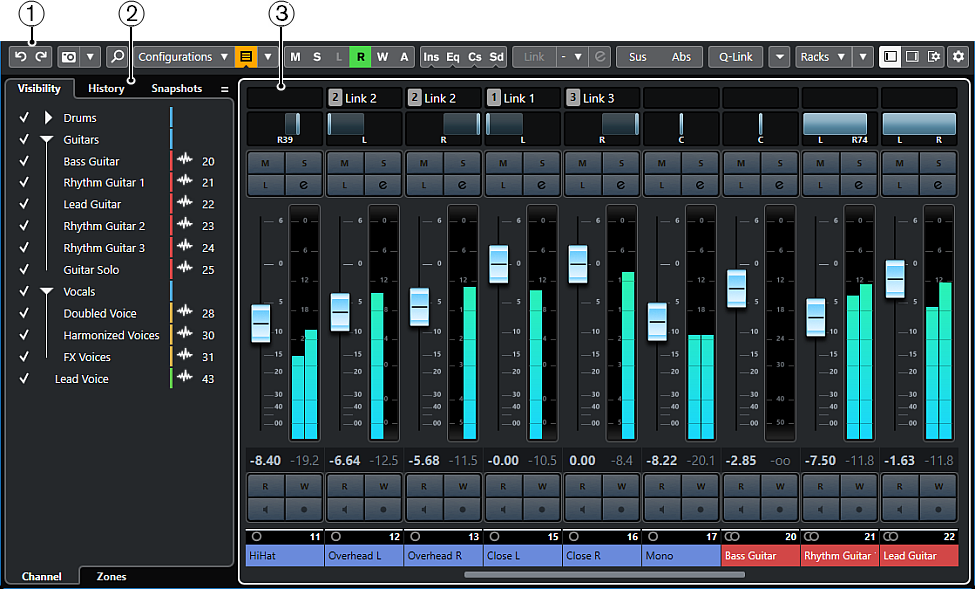
The MixConsole is divided into the following sections:
-
Toolbar
The toolbar shows tools and shortcuts for settings and functions in the MixConsole.
-
Inspector (Left Zone)
Allows you to set up the visibility and positions of channels in the fader section.
-
Fader section
The fader section is always visible and shows all channels in the same order as in the track list.
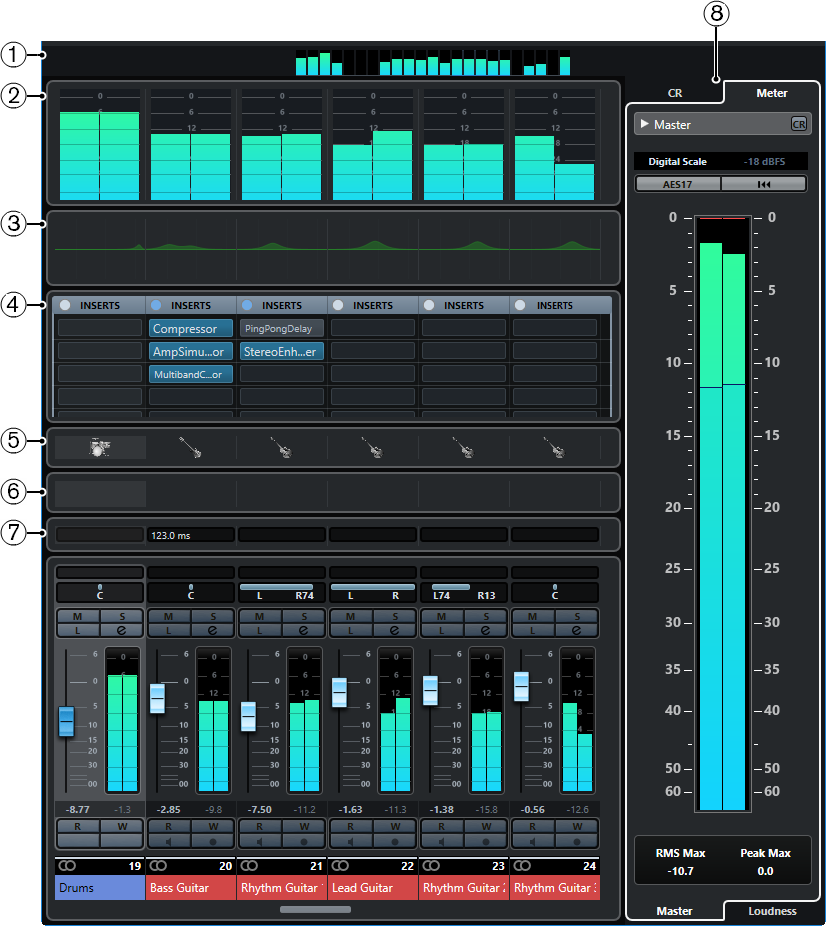
Apart from the main sections, you can also access the following sections from within the MixConsole window:
-
Channel overview
Displays all channels as boxes. If you have more channels than can be displayed in the window, you can use the channel overview to navigate to other channels and select them.
-
Meter bridge
Allows you to monitor the levels of your channels.
To select a meter type, open the meter bridge context menu and select either PPM or Wave.
-
Equalizer curves
Allows you to draw an EQ curve. Click in the curve display to open a larger view where you can edit the curve points.
-
Channel racks
Allows you to show additional channel controls as needed.
-
Pictures
Allows you to add a picture to the selected channel. Pictures can help you identify your MixConsole channels quickly.
-
Notepads
Allows you to enter notes and comments about a channel. Each channel has its own notepad.
-
Channel Latencies
Allows you to show the latencies caused by insert effects or channel strip modules.
-
Control Room/Meter (Right Zone) (Cubase Pro only)
Allows you to divide the studio environment into the performing area (studio) and the engineer/producer area (control room).