Setting up meter colors can help you to keep an overview of what levels are being reached.
Procedure
-
In the Preferences dialog, select .
-
Do one of the following:
-
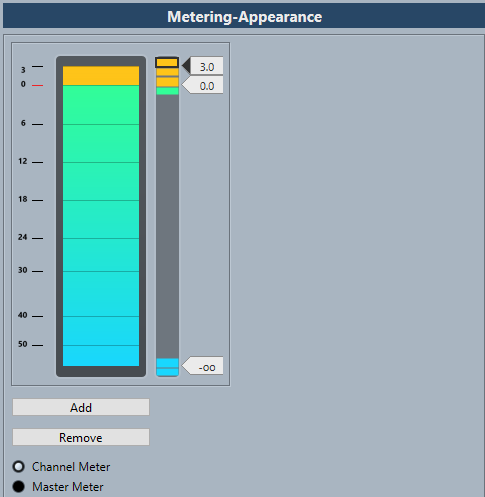
Do one of the following to set the level position for a color change:
-
Double-click a level position to the right of the meter scale and enter the level (dB) value. To enter dB values smaller than zero, add a minus sign before the entered number.
-
Click a level position and drag it to a specific level, and press Shift for more accurate positioning.
-
Click a level position and nudge it up or down with the Up Arrow/Down Arrow keys, and press Shift for faster positioning.
-
Click the upper or lower part of a color handle so that a frame is shown, and in the color picker, select a color.
Selecting the same color for the upper and lower part of the handle results in a meter that changes its colors gradually. Different colors indicate level changes even more precisely.
Note
-
To add more color handles, click Add, or Alt-click at a level position to the right of the meter scale. Each new handle is automatically associated with a default color.
-
To remove a handle, select the handle and click Remove, or Ctrl/Cmd-click the handle.
-
Click OK.