Export Audio Mixdown Dialog
The Export Audio Mixdown dialog allows you to set up how audio is mixed down and exported.
-
To open the Export Audio Mixdown dialog, select .
The Export Audio Mixdown dialog is divided into several sections.
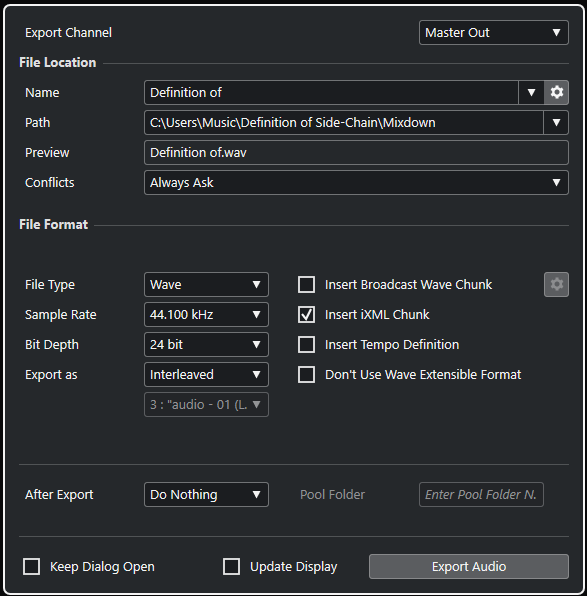
Export Channel
In the Export Channel pop-up menu, you can select an output channel for export.
File Location
In the File Location section, the following options are available:
- Name
-
Allows you to specify the name of the mixdown file.
Click File Name Options to open a pop-up menu with naming options:
-
Set to Project Name inserts the project name into the Name field.
-
Auto Update Name adds a number to the file name and increments the number every time you export a file.
Click Set up Naming Scheme to open a dialog where you can specify a naming scheme.
-
- Path
-
Allows you to specify the file path for the mixdown file.
Click Path Options to open a pop-up menu with file path options:
-
Choose opens a dialog that allows you to browse for a file location.
-
Use Project Audio Folder sets the path to the Audio folder of your project.
-
Project Mixdown Folder sets the path to the Mixdown folder of your project.
NoteIf you activate Project Mixdown Folder, the option Use Project Audio Folder is automatically disabled.
The Mixdown folder is automatically created in your project folder. It is used by default if no export path information is available, that is, if you create a new empty project, or if you load or create a project from a template.
-
Recent Paths allows you to select recently selected file locations.
The Mixdown folder is not added to the list of Recent Paths.
-
Clear Recent Paths allows you to delete all recently selected file locations.
-
- Preview
-
Shows the file name with the naming scheme applied.
- Conflicts
-
Exporting audio can cause naming conflicts with existing files that have the same name. You can define how file name conflicts are resolved:
-
Always Ask opens a warning that allows you to choose if an existing file should be overwritten or if a new unique file name should be created by adding an incremental number.
-
Create Unique File Name creates a unique file name by adding an incremental number.
-
Always Overwrite always overwrites the existing file.
-
File Format
In the File Format section, the following options are available:
- File Type
-
Allows you to select a file type for the mixdown file.
- Sample Rate
-
Sets the sample rate for the mixdown file.
Note-
Wave, AIFF files only: If you set the value lower than the project sample rate, the audio quality degrades and the high-frequency content is reduced. If you set the value higher than the project sample rate, the file size increases without increasing the audio quality. For CD burning, select 44.100 kHz, because this is the sample rate used on audio CDs.
-
- Bit Depth (Wave, AIFF, FLAC)
-
Allows you to select a bit depth for the mixdown file.
- Bit Rate (MPEG 1 Layer 3)
-
Sets the bit rate for the MP3 file. The higher the bit rate, the better the audio quality and the larger the file. For stereo audio, 128 kBit/s is considered to be providing good audio quality results.
- Export as
-
Allows you to select a channel mode for the mixdown file:
-
Interleaved
Allows you to export to an interleaved file.
-
Split Channels
Allows you to export the 2 channels of a stereo bus as separate mono files.
-
Mono Downmix
Allows you to downmix the 2 channels of a stereo bus to a single mono file.
-
- Insert Broadcast Wave Chunk (Wave, AIFF)
-
Activates the embedding of additional file information in Broadcast Wave format.
NoteBy activating this option, you create a Broadcast Wave file. Some applications may not be able to handle these files. If you get problems using the file in another application, deactivate Insert Broadcast Wave Chunk and export the file again.
- Set up Broadcast Wave Chunk (Wave, AIFF)
-
Opens the Broadcast Wave Chunk dialog where you can enter information.
- Don’t Use Wave Extensible Format (Wave)
-
Deactivates the Wave Extensible format that contains additional metadata, such as the speaker configuration.
- Insert iXML Chunk (Wave, AIFF)
-
Includes additional project-related metadata, such as project name, author, and project frame rate.
- Insert Tempo Definition (Wave, AIFF)
-
This option is only available if Insert iXML Chunk is activated. It allows you to include tempo information from the tempo track in the iXML chunk of the exported files.
- High-Quality Mode (MPEG 1 Layer 3)
-
Sets the encoder to a different resampling mode. This may give better results depending on your settings. However, it does not allow you to select the Sample Rate.
- Insert ID3 Tag (MPEG 1 Layer 3)
-
Includes ID3 Tag information in the exported file.
- Edit ID3 Tag (MPEG 1 Layer 3)
-
Opens the Setup ID3 Tag dialog that allows you to enter information about the file. This information is embedded in the file and can be displayed by most MP3 playback applications.
- Compression Level (FLAC)
-
Sets the compression level for the FLAC file. Since FLAC is a lossless format, the level has more influence on the encoding speed than on the file size.
- Quality (OggVorbis)
-
Sets the quality for the variable bit rate encoding. This setting determines between which limits the bit rate will vary. The higher the value, the higher the sound quality but also the larger the files.
- After Export
-
-
Do Nothing does nothing after export.
-
Open in WaveLab opens your mixdown file in a WaveLab version after export. This requires that a WaveLab version is installed on your computer.
-
Create New Project
NoteThis option is only available for uncompressed file formats, and if Use Project Audio Folder is deactivated.
Creates a new project that contains an audio track for each of the exported channels, as well as the signature and tempo track of the original project.
The tracks will have the corresponding mixdown file as audio event. The track names will be identical with the export channel names. The new project will be the active project.
Activating this option disables the Insert to Pool and Create Audio Track options.
-
Create Audio Track
Creates an audio event that plays the clip on a new audio track, starting at the left locator. Activating this option also activates the Pool option.
-
Insert to Pool
Imports the resulting audio file automatically back into the Pool as a clip. Deactivating this option also deactivates the Create Audio Track option.
-
- Pool Folder
-
Allows you to specify a Pool folder for the clip.
General Options
In the bottom section, the following options are available:
- Keep Dialog Open
-
Activate this to keep the dialog open after clicking Export Audio.
- Update Display
-
Updates the meters during the export process. This allows you to check for clipping, for example.
- Export Audio
-
Allows you to export your audio as specified.